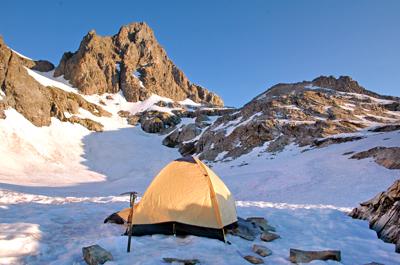
Climbing Mt Ritter - is great fun for experienced mountaineers. Our climb which took place in July of 2006 turned out to be much more of a snow and ice climb than we thought since we choose the North Face Route over the more popular Southeast Glacier Route. This was due to the record snows that Mammoth Mountain area received that year. The North Face Route was first climbed by John Muir in 1872.
 What normally would have been an easy class three scramble, turned into a class four situation in a couple of places, because snow and ice had covered some of the class three climbing areas making them unsafe for upward progress. The class four climbing that we did was free of snow (due to the high angle of the rock), and we took this option rather than risking a fall on slippery snow and ice that made up the traditional route. Fortunately we had about a 60 foot length of lightweight rope along, and this proved invaluable for protecting the more exposed moves on the class 4 rock.
I would always recommend carrying a rope for any climb that that you do that involves class three or greater climbing. You never know when you may be forced of route, or unknowingly get off route. Never take chances with your life. Making a summit is never worth getting injured or dying for. For more on the subject of the Yosemite Decimal System for Rating a Climb, please check out our Introduction to Climbing page.
Nevertheless, the climb went pretty smooth, and we ended up gaining about 60-70 percent of our vertical gain on snow and ice and the rest on rock. You should always carry rope, crampons, and ice ax on all summit attempts in the Banner / Ritter Range. 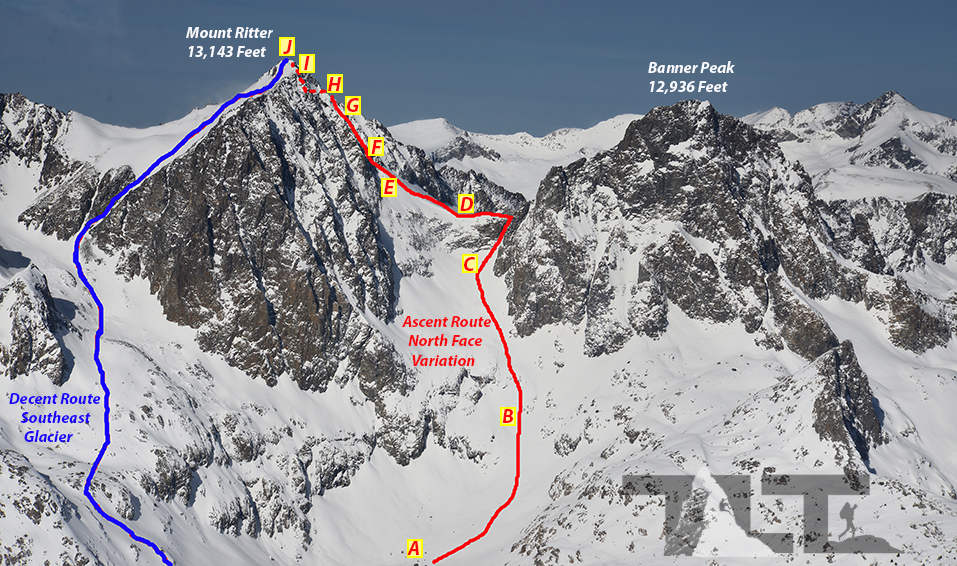
Above is an Aerial Photo I took in early March of 2014. Use the below links to see an image of each section in the above photo.
A=High Camp,
B=Lower Snow Slopes,
C=Upper Snow/Ice Section,
D=Ritter Banner Saddle,
E=Ritter/Banner Saddle Below,
F=Lower Class 3 North Face,
G=Class 3 Traverse,
H=Traverse to Final Pitch,
I=Top of Snow Cornice,
J=Summit
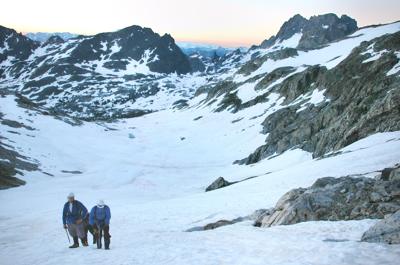
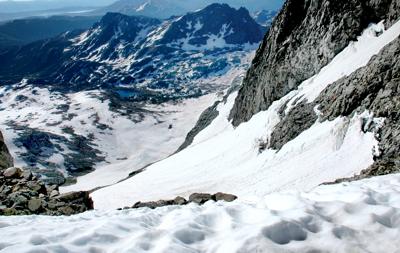
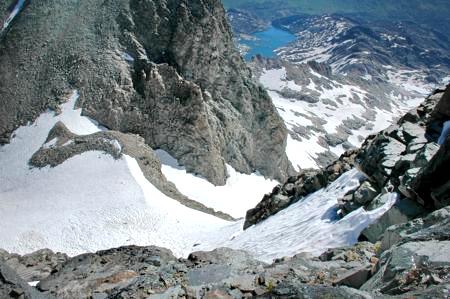
 We usually get well under way before sunrise. Pre-dawn starts are a great way to gain altitude without battling the blazing high altitude sun. Crossing snow fields is easy with headlamps in the dark. If the terrain is more technical, you need to plan accordingly. In the above left hand photo you can see us negotiating the lower slopes of Mt Ritter /Banner as we work our way up to the Ritter/Banner Saddle. In the upper right hand image you see a view looking down slope just before reaching the saddle. This was the easiest part of the climb being that it was a pretty straight forward snow/ice climb with crampons and ice ax. Later in the season this section becomes a lot harder because you will then have to fight your way up loose rock and scree.
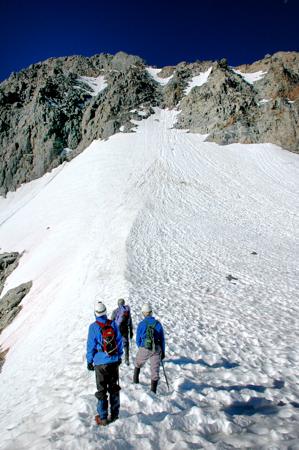
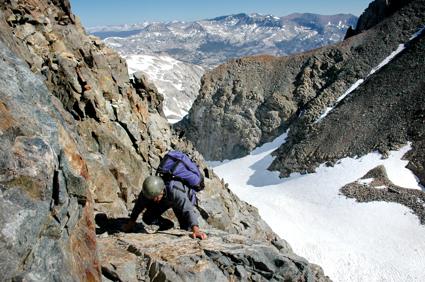
 After gaining the Ritter/Banner Saddle (above photo to the left), we contemplate the next section. At the Saddle you have a choice to either climb Banner Peak or Mt Ritter. On this trip we choose to do Mt Ritter.
 As you can see, traversing the saddle is easy enough, and we made quick work of it. We always try to make maximum use of good snow and ice when Mountaineering. They are a great way to gain altitude quickly if you are carrying an ice ax and are wearing crampons.
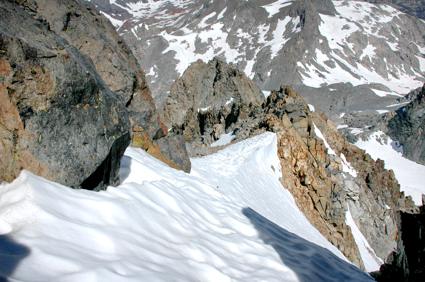
After gaining the top of this snow section, we meet up with the rock that makes up the class three part of the North Face of Mt Ritter. You can see Mike exiting that section in the upper right hand image. For more on class ratings for rock climbs, please check out our page on Climbing.
In the lower right hand photo, you see the view looking down into the Ritter/Banner Saddle. Getting to this point took a bit of rock climbing as mentioned above. Always cool to be able to look back and see your progress. Slow and steady gets the job done.
There were a couple of sections where we were forced off route and ended up doing a bit of class 4 climbing. This was due to the fact that we had a lot of snow that year we climbed Mt Ritter (as mentioned at the beginning of this page), and it was a good thing that we had a rope available to protect those sections. Even with class 3, it never hurts to have a rope along. It is very easy to get off course mountaineering, and having a rope along gives you that much needed extra margin of safety.
Note: Class 3 can be described as climbing a tall building without a handrail, and you need to know the fear and skill level of all folks in your climbing party. Some climbers out there have no problem going without a rope for class three, but we always take a lightweight 60 foot (plus or minus) section of rope for class 3, because you never know when you are going to run into problems or if someone in your climbing party is feeling just a bit off the mark that day.
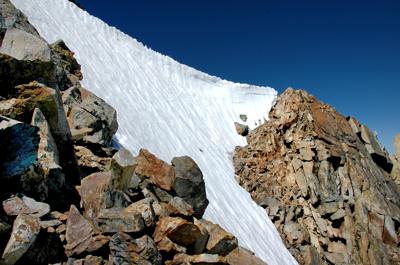
 A fantastic view of a snow and ice wall high up on Mt Ritter in the image to the left. Note the cornice at the top. It is important to take notice of the upper overhanging snow sections so that when you get to the top of the structure you don't venture too close to the edge. Cornices are very dangerous, to say the least, and traveling above or below them should be avoided if at all possible.
In the above right hand image, you see a view looking down on the snow structure that is shown in the above left hand photo. We traversed the below ridge in order to keep on course. But as mentioned above, we stayed just enough to the left of the cornice in order to avoid the danger of it collapsing and taking us with it.
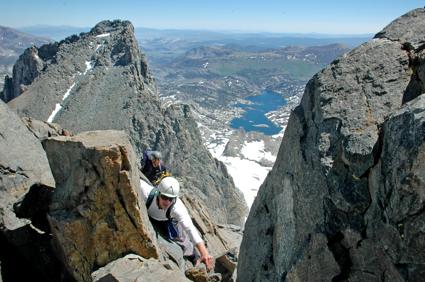
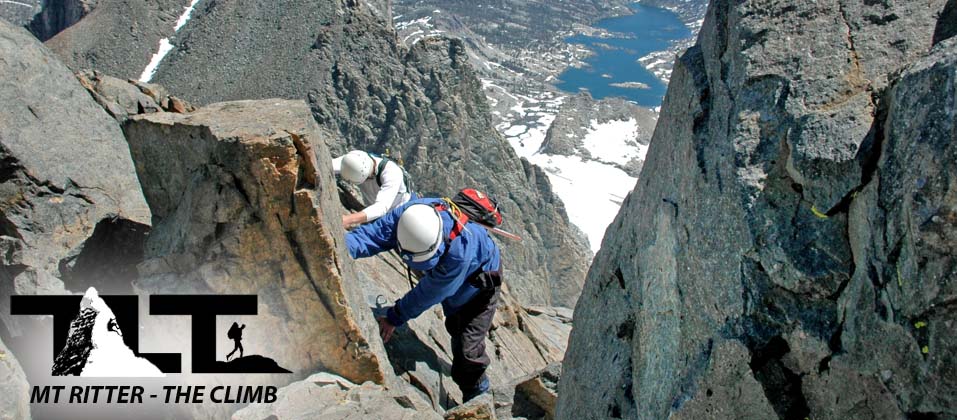
.") Sean and Eddie exiting the north face section (photo upper left), and rounding a small block before reaching the final summit approach. Not much more to go before reaching the top of Mount Ritter. In the above right hand photo, you see a view looking down on Banner Peak (center) from near the summit of Mt Ritter. One of the many rewards of mountain climbing, are the superb views.
Sean and Eddie exiting the north face section (photo upper left), and rounding a small block before reaching the final summit approach. Not much more to go before reaching the top of Mount Ritter. In the above right hand photo, you see a view looking down on Banner Peak (center) from near the summit of Mt Ritter. One of the many rewards of mountain climbing, are the superb views.
 After a short climb, we are finally on top. No photo can capture the grandeur of actually being there. The scale of our surroundings were absolutely incredible.
Mt Ritter is a wonderful peak, and some go so far to say that it is the most prominent peak in the High Sierra (due to the fact that it can be seen from many of the surrounding summits in the range).
As mentioned above, John Muir was the first to climb the peak in 1872, but he approached it from the north after guiding a party of artists into Yosemite's wilderness. After gaining the saddle, he more or less finished the climb as described above.
Well, that's about it for our Climb up Mt Ritter via the North Face. It was certainly well worth the effort, and I would highly recommend it to all you mountaineer's out there. So at this point, please use the Mt Ritter menu for more adventures on this beautiful peak along with some of the best backpacking in the Sierra Nevada! Email Sign Up

| Join the Adventure! Sign up here for Timberline Trails Monthly Newsletter |

Join us on Instagram
©2006-2026 TimberlineTrails. All Rights Reserved.
....